Adding Staticman Comments
I’ve added comments to my blog. You can find the existing comments, if any, and the new comment form at the bottom of any post.
I thought this would take a couple hours, but it actually took [REDACTED]. Estimates are hard.
Here’s what I did.
Table of Contents
- Table of Contents
- Introduction
- Set Up GitHub Bot Account
- Set Up the Blog Repository Configuration
- Set Up the API Bridge
- Invite and Accept Bot to Blog Repo
- Enable reCAPTCHA
- Integrate Comments Into Site
- Testing on This Post
- Thanks
- References
Introduction
I am using staticman, created by Eduardo Bouças, as my comments system for this static site.
The basic flow for comment submission is as follows:
- A reader submits the comment form on a blog post.
- Javascript1 attached to the form submits it to my staticman API bridge2 running on Heroku.
- The API bridge does some validation of the request and submits a pull request to the github repo hosting my blog, consisting of a .yml file with the post content and meta data.
- When I accept the pull request, it triggers a regeneration and republishing of the content (this is a GitHub pages feature), so the reply appears almost immediately3.
Here are the detailed steps to get this working. There are several other tutorials out there, with varying states of exhaustiveness, some of which I found only after writing most of this, but I’m going to add the pile anyways. There have been several changes to deploying staticman which mean that existing resources (and this one, of course) are marked by which “era” they were written in.
The major changes are:
- At one point the idea was that everyone would use the public staticman API bridge, but this proved unsustainable. A large amount of the work in setting up staticman is associated with running your own instance of the bridge.
- There are three version of the staticman API: v1, v2 and v3. This guide uses v2 (although v3 is almost identical4), but the v1 version is considerably different.
Set Up GitHub Bot Account
You’ll want to create a GitHub bot account which will be the account that the API bridge uses to actually submit the pull requests to your blog repository. In principle, you can skip this step entirely and simply use your existing GitHub account, but I wouldn’t recommend it:
- You’ll be generating a personal access token for this account, and uploading it to the cloud (Heroku) and if this somehow gets compromised, it’s better that it’s a throwaway bot account than your real account.
- Having a dedicated account makes it easy to segregate work done by the bot, versus what you’ve done yourself. That is, you probably don’t want all the commits and pushes the bot does to show up on your personal account.
The bot account is nothing special: it is just a regular personal account that you’ll only be using from the API bridge. So, open a private browser window, go to GitHub and choose “Sign Up”. Call your bot something specific, which I’ll refer to as GITHUB-BOT-NAME from here forwards.
Generate Personal Access Token
Next, you’ll need to generate a GitHub personal access token, for your bot account. The GitHub doc does a better job of explaining this than I can. If you just want everything to work for sure now and in the future, select every single scope when it prompts you, but if you care about security you should only need the repo and user scopes (today):
Repo scope:

User scope:

Copy and paste the displayed token somewhere safe: you’ll need this token in a later step where I’ll refer to it as ${github_token}. Once you close this page there is no way to recover the access token.
Set Up the Blog Repository Configuration
You’ll need to include configuration for staticman in two separate places in your blog repository: _config.yml (the primary Jekyll config file) and staticman.yml, both at the top level of the repository.
In general, the stuff that goes in _config.yml is for use within the static generation phase of your site, e.g., controlling the generation of the comment form and the associated javascipt. The stuff in staticman.yml isn’t used during generation, but is used dynamically by the API bridge (read directly from GitHub on each request) to configure the activities of the bridge. A few thigns are duplicated in both places.
Configuring staticman.yml
Most of the configuration for the ABI bridge is set in staticman.yml which lives in the top level of your blog repository. This means that one API bridge can support many different blog repositories, each with their own configuration (indeed, this feature was critical for the original design of a shared ABI bridge).
Here’s a sample file from the staticman GitHub repository, but you might want to use this one from my repository as it is a bit more fleshed out.
The main things you want to change are shown below.
# all of these fields are nested under the comments key, which corresponds to the final element
# of the API bridge enpoint, i.e., you can different configurations even within the same staticman.yml
# file all under different keys
comments:

  # There are many more required config values here, not shown:
  # use the file linked above as a template

  # I guess used only for email notifications?
  name: "Performance Matters Blog"

  # You may want a different set of "required fields". Staticman will
  # reject posts without all of these fields
  requiredFields: ["name", "email", "message"]

  # you are going to want reCaptcha set up, but for now leave it disabled because we need the API
  # bridge up and running in order to encrypt the secrets that go in this section
  reCaptcha:
    enabled: false
  #  siteKey: 6LcWstQUAAAAALoGBcmKsgCFbMQqkiGiEt361nK1
  #  secret: a big encrypted secret (see Note above)
Configuring _config.yml
The remainder of the configuration goes in _config.yml. Here’s the configuration I added to start with (we’ll add a bit more later):
# The URL for the staticman API bridge endpoint
# You will want to modify some of the values:
#  ${github-username}: the username of the account with which you publish your blog
#  ${blog-repo}: the name of your blog repository in github
#  master: this the branch out of which your blog is published, often master or gh-pages
#  ${bridge_app_name}: the name you chose in Heroku for your bridge API
#  comments: the so-called property, this defines the key in staticman.yml where the configuration is found
#
# for me, this line reads:
# https://staticman-travisdownsio.herokuapp.com/v2/entry/travisdowns/travisdowns.github.io/master/comments
staticman_url: https://${bridge_app_name}.herokuapp.com/v2/entry/${github-username}/${blog-repo}/master/comments
Set Up the API Bridge
This section covers deploying a private instances of the API bridge to Heroku.
Generate an RSA Keypair
This keypair will be used to encrypt secrets that will be stored in public places, such as your reCAPTCHA site secret. The sececrets will be encrypted with the public half of the keypair, and decriped in the Bridge API server with the private part.
Use the following on your local to generate to generate the pair:
ssh-keygen -m PEM -t rsa -b 4096 -C "staticman key" -f ~/.ssh/staticman_key
Don’t use any passphrase5. You can change the -f argument if you want to save the key somewhere else, in which case you’ll have to use the new location when setting up the Heroku config below.
You can verify the key was genreated by running:
head -2 ~/.ssh/staticman_key
Which should output something like:
-----BEGIN RSA PRIVATE KEY-----
MIIJKAIBAAKCAgEAud7+fPWXzuxCoyyGbQTYCGi9C1N984roI/Tr7yJi074F+Cfp
Your second line will vary of course, but the first line must be -----BEGIN RSA PRIVATE KEY-----. If you see something else, perhaps mentioning OPENSSH PRIVATE KEY, it won’t work.
Sign Up for Heroku
The original idea of staticman was to have a public API bridge that everyone uses for free. However, in practice this hasn’t proved sustainable as whatever free tier the thing was running on tends to hit its limits and then the fun stops. So the current recommendation is to set up a free instance of the API bridge on Heroku. So let’s do that.
Sign up for a free account on Heroku. No credit card is required and a free account should give you enough juice for at least 1,000 comments a month6.
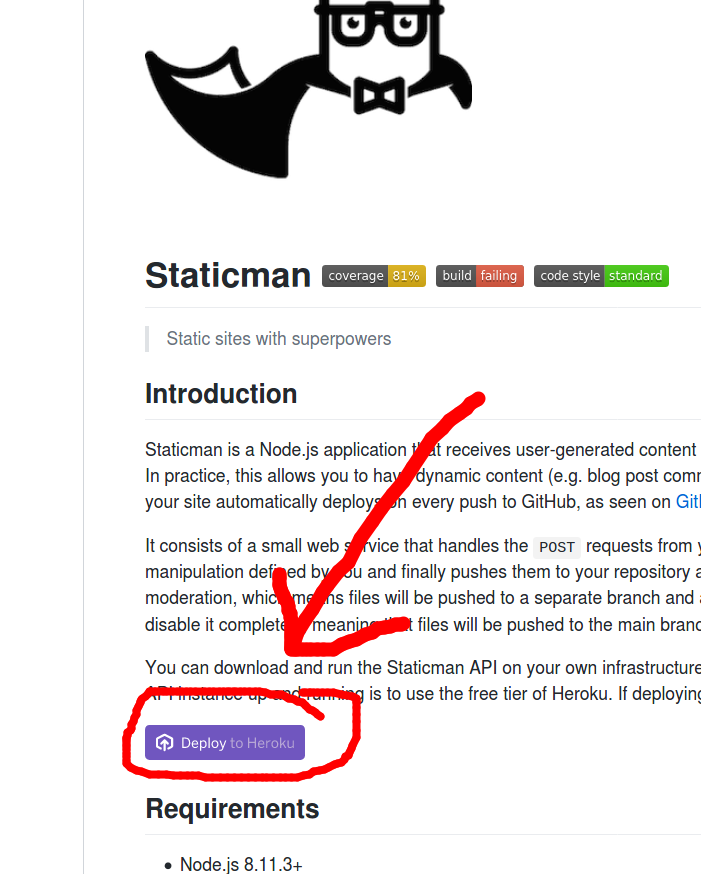
Deploy Staticman Bridge to Heroku
The easiest way to do this is simply to click the Deploy to Heroku button in the README on the staticman repo:
You’ll see probably some logging indicating that the project is downloading, building and then successfully deployed.
Configure Bridge Secrets
The bridge needs a couple of secrets to do its job:
- The GitHub personal access token of your bot account. This lets it do work on behalf of your bot account (in particular, submit pull requests to your blog repository).
- The private key of the keypair you generated earlier.
If you want, you can add both of these through the Heroku web dashboard: go to Settings -> Reveal Config Vars, and enter them like this).
However, you might as well get familiar with the Heroku command line, because it’s pretty cool and allows you to complete this flow without having your GitHub token flow through your clipboard and makes it easy to remove the newline characters in the private key.
Follow the instructions to install and login to the Heroku CLI, then issue the following commands from any directory (note that ${github_token} is the personal access token you generated earlier: copy and paste it into the command):
heroku config:add --app ${bridge_app_name} "RSA_PRIVATE_KEY=$(cat ~/.ssh/staticman_key | tr -d '\n')"
heroku config:add --app ${bridge_app_name} "GITHUB_TOKEN=${github_token}"
Here, the tr -d '\n' part of the pipeline is removing the newlines from the private key, since Heroku config variables can’t handle them and/or the API bridge can’t handle them.
You can check that the config was correctly set by outputting it as follows:
heroku config --app ${bridge_app_name}
Invite and Accept Bot to Blog Repo
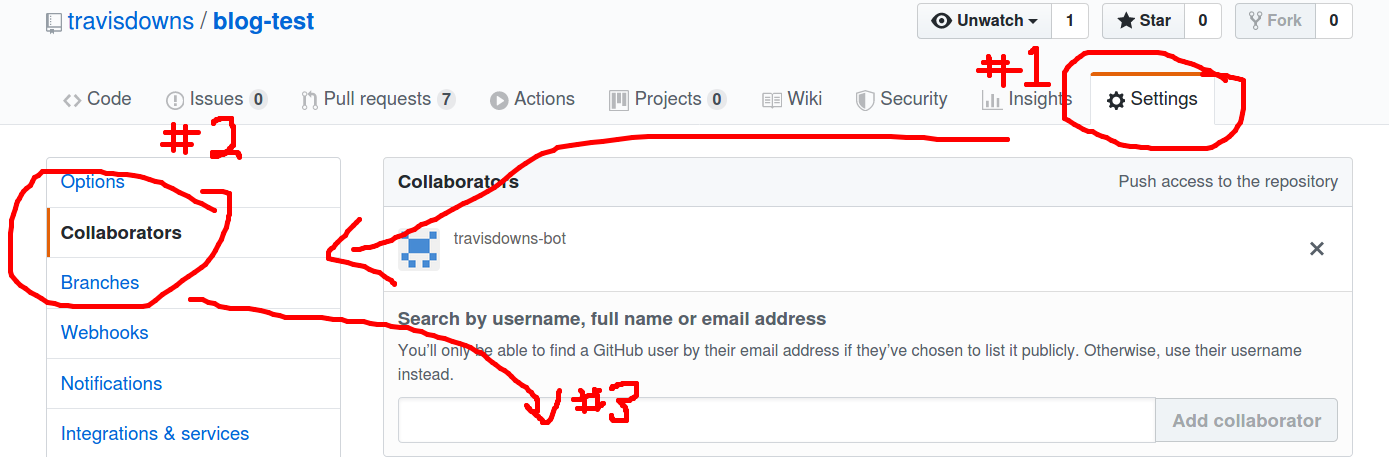
Finally, you need to invite your GitHub bot account that you created earlier to your blog repository7 and accept the invite.
Open your blog repository, go to Settings -> Collaborators and search for and add the GitHub bot account that you created earlier as a collaborator:
Next, accept8 the invitation using the bridge API, by going to the following URL:
https://${bridge_app_name}.herokuapp.com/v2/connect/${github-username}/${blog-repo}
You should see OK! as the output if it worked: this only appears once when the invitation got accepted, at all other times it will show Invitation not found.
Enable reCAPTCHA
You are going to want to gate comment submission using reCAPTCHA or a similar system so you don’t get destroyed by spam (even if you have moderation enabled, dealing with all the pull requests will probably be tiring).
Here we’ll cover setting up reCAPTCHA, which has built-in support in staticman. Although it involves modifying the same _config.yml and staticman.yml files that we’ve modified before, this part of the configuration needs to occur after the bridge is running because we use the /encrypt endpoint on the bridge as part of the setup.
Sign Up for reCAPTCHA
Go to reCAPTCHA and sign up if you haven’t already, and create a new site. We are going to use the “v2, Checkbox” variant (docs here), although I’m interested to hear how it works out with other variants.
You will need the reCAPTCHA site key and secret key for configuration in the next section.
Configure reCAPTCHA
Next, we need to add the site key and secret key to the _config.yml and staticman.yml config files.
The site key will be used as-is, but the secret key property will be encrypted so that it is not exposed in plaintext in your configuration files. To encrypt the secret key copy the secret from the reCAPTCHA admin console, and load the following URL from your API bridge, replacing YOUR_SITE_KEY at with the copied secret key.
https://${bridge_app_name}.herokuapp.com/v2/encrypt/YOUR_SITE_KEY
You should get a blob of characters back as a result (considerably longer than the original secret) – it is this value that you need to include as reCaptcha.secret in both staticman.yml and in _config.yml.
The reCAPTCHA configuration for both files is almost the same. It looks like this for staticman.yml:
comments:

  # more stuff

  # note that reCaptcha is nested under comments
  reCaptcha:
    enabled: true
    # the siteKey is used as-is (no encryption)
    siteKey: 6LcWstQUAAAAALoGBcmKsgCFbMQqkiGiEt361nK1
    # the secret is the encrypted blob you got back from the encrypt call
    secret: a big encrypted secret (see description above)
The _config.yml version is similar except that they key appears at the top level and there is no enabled property:
# reCaptcha configuration info: the exact same site key and *encrypted* secret that you used in staticman.yml
# I personally don't think the secret needs to be included in the generated site, but the staticman API bridge uses
# it to ensure the site configuration and bridge configuration match (but why not just compare the site key?)
reCaptcha:
  siteKey: 6LcWstQUAAAAALoGBcmKsgCFbMQqkiGiEt361nK1
  secret: exactly the same secret as the staticman.yml file
Integrate Comments Into Site
Finally, you need to integrate code to display the existing comments and submit new comments.
I used a mash up of commenting code from the spinningnumbers.org blog as well as the staticman integration in the minimal mistakes theme. The advantage the former has over the latter is that the comments allow one level of nesting (replies to top-level comments are nested beneath it).
I planed to extract the associated markdown, liquid and JavaScript code to a separate repository as a single point where people could collaborate on this part of the integration, but man I’ve already spent way to long on this. I may still do it, but for now here’s how I did the integration.
Markdown Part
The key thing you need to do is include a blob of HTML and associated JavaScript in any page where you want to display and accept comments. I do this as follows:
{% if page.comments == true %}
  {% include comments.html %}
{% endif %}
You can paste it into any post, or better add it to the footer.html include or something like that (details depend on your theme). The invariant is that wherever this appears, the existing comments appear, followed by a form to submit new comments. You can see the comments.html include here – in turn, it includes comment.html (once per comment, generates the comment html) and comment_form.html which generates the new comment form.
This ultimately includes external JavaScript for JQuery and reCAPTCHA, as well as main.js which includes the JavaScript to implement the replies (moving the form when the “reply to” button is clicked, and submitting the form via AJAX to the API bridge).
You can try to use this same integration in your Jekyll blog. You’d need to:
- Copy the
_includes/comment.html,_includes/comments.html,_includes/comment_form.html,assets/main.js, and_sass/comment-styles.cssfrom my blog files to your blog repository. - In
assets/main.js, replace the link tohttps://github.com/travisdowns/travisdowns.github.io/pullswith a link to your own repository (or otherwise customize the “success” message as you see fit). - Include
@import "comment-styles";in yourassets/main.scssfile. If you don’t have one, you’ll need to create it following the rules for your theme. Usually this just means amain.scsswith empty front-matter and an@import "your-theme";line to import the theme SCSS. Alternately, you could avoid putting anything inmain.scssand just include the comment styles as a separate file, but this adds another request to each post. - Do the
include comments.htmlthing shown above in an appropriate place in your template/theme. - Set
comments: truein the front matter of posts you want to have comments (or set it as a default in_config.yml).
Testing on This Post
If you want to leave a non-trivial comment on the content of this post, you can do so below. However, if you’d instead like to make a “just testing” post, to see how the http request works, or check the created pull request, etc, please do it over here. Testing only comments made on this post will be closed without accepting them.
Thanks
Thanks to Eduardo Boucas for creating staticman.
Thanks to Willy McAllister for nested comment display work I unabashedly cribbed, and helping me sort out an RSA key genreation problem, and pointing out some inconsistencies in the doc.
References
Things that were handy references while getting this working.
This comment on GitHub issue #318 was the list that I more or less follwed (I didn’t use the dev branch though).
Willy McAllister describes setting up staticman in this post – his implemented of nested comments forms the basis the one I used.
Another list of steps to get staticman working and some troubleshooting.
Michael Rose, the author of minimal mistakes Jekyll theme describes setting up nested staticman comments – I cribbed some stuff from here such as the submitting spinner.
Willy McAllister subsequently wrote a great guide to setting up Staticman, similar in nature to this one but with some additional sections such as troubleshooting and setting up reply notifications via MailGun. If that one was around when I started out, I wouldn’t have felt the need to write this one.
-
If javascript is disabled, a regular POST action takes over. ↩
-
I don’t think you’ll find this bridge term in the official documentation, but I’m going to use it here. ↩
-
Well, subject to whatever edge caching GitHub pages is using – btw you can bust the cache by appending any random query parameter to the page:
...post.html?foo=1234. ↩ -
v3 mostly just extends to the URL format for the
/eventendpoint to include the hosting provider (either GitHub or GitLab), allowing the use of GitHub in addition to GitLab. Almost everything in this guide would remain unchanged. ↩ -
You could use a passphrase, but then you’ll have to change the
catused below to echo the key into the Heroku config. If you want to be super safe, best is to generate the key to a transient location like ramfs and then simply delete the private portion after you’ve uploaded it to the Heroku config. ↩ -
In particular, the unverified (no credit card) free tier gives you 550 hours of uptime a month, and since the dyno (heroku speak for their on-demand host) sleeps after 30 minutes, I figure you can handle 550/0.5 = 1100 sparsely submitted comments. Of course, if comments come in bursts, you could handle much more than that, since you’ve already “paid” for the 30 minute uptime. ↩
-
The bot needs to be a collaborator to, at a minimum, commit comments to the repository, and to delete branches (using the delete branches webhook which cleans up comment related branches). However, it is possible to not use either of these features if you have moderation enabled (in which case comments arrive as a PR, which doesn’t require any particular permissions), and aren’t using the webhook. So maybe you could do without the collaborator status in that case? I haven’t tested it. ↩
-
I guess you can also just accept the invitation by opening the email sent to you by github and following the link there. This workflow involving the
v2/connectendpoint probably made more sense when the API was meant to be shared among many uses using a common github bot account. ↩
Comments
Thanks for the nice post!
Hi travis, would you have any idea why my posts have comments but not on my regular pages. My regular pages, like home page, have a comment form but will not display comments.
https://github.com/zachkarol430/zachkarol430.github.io
I am not sure what is going on. I’d start looking at the code here: this is where the comments are rendered. Check to see what
page.slugis and if the data files as expected under that slug. Perhaps something is wrong with the matching based on the slug.Does your page name have any special characters, spaces, etc? Search on this page for
slugand you’ll see several comments which might point you in the right direction, especially the one that says I should be slugifying my slug.I just wanted to say thank you. I fixed the issue by just making some of my pages as posts. Your guide was extremely helpful and I am happy I don’t have to use disqus.
Thank you for this nice explanation!
Hi, Thanks for your detailed instrcution, just want to add that some of the scss variables need to be modified if a different theme is used. I encountered a problem, the comment section can be seen on my github page, but when I submit a comment it shows a pop up window: Server Error An error occured.
[GITHUB_READING_FILE]Not sure what could be the problem?I generated a github auth key from a bot account I got OK! with the url from heroku, I have generated secret key from your given website and pasted them into reCaptcha section of both staticman and _config yaml files, The html and css are copied from your site, and they showed up properly on the website. I used heroku interface to paste the rsa private key, with all the nextline char removed.
Hey! Did you manage to figure it out?
Isn’t there a feature such as paginating the comments?, if there are 1000s of comments on your site, the download will never end :(
Appreciate the guide, thank you!
Hi Travis,
thank you for such a detailed tutorial! I was able to deploy my heroku website successfully and followed all the steps you listed except for creating a bot account. I also didn’t add a main.scss for now, as having comment style/css is least of my concern. After spending enough time on just the recaptcha, staticman, and heroku setup I just wanted to see if the comment actually work/show up but I dont see them on my website. :(
I added this code:
{% if page.comments == true %} {% include comments.html %} {% endif %}
to my default.html which is my ‘theme’ page that applies to all my html pages but the comment section is shown on none of them. I put it inside a and the end of my default.html before the footer.
I was wondering if I could get some help.
My first thought is that it has something to do with the conditional if page.comments == true, I am guessing it’s not ‘true’ for my ‘page’ which is why comment section is not showing up. How do i check?
Hi Stuti,
I can’t really help you with detailed debugging, but a couple of comments:
I think you do probably need the main.scss, because the CSS not just about appearance but functionality in some cases (e.g., the modal dialog needs to styled in a certain way to work properly).
If you have that
{% if page.comments == true %}check, you’ll definitely need to havepage.commentsset for your page. You would normally do this by adding acomments: trueline to your post front-matter (the part between the---at the start of the markdown file for the post), or you can set it default for all pages by setting it as default in the config as I do.Note that in either case it’s just
commentsnotpage.commentsbecause thepagescope is already implied.Hope that helps!
Thanks for really awesome guide!
Is this working from and in China?
I don’t see why not.
great post really helpful
Thanks for the artice!
Testing if maths works: \(f(x)\) ( f(x) ) $ f(x) $ [ f(x) ]
In principle, kramdown has support for LaTeX, using the
$$ your formula here $$syntax and MathJax by default, but I haven’t included any of the required JS for it to actually render client side. I do miss math layout support though, and I’m thinking of adding it, but likely via Katex, pre-rendered to HTML rather than Mathjax + HTML.Amazing post. thanks for sharing.
Thank you for writing this! I appreciate it.
Is it actual in 2021-2022
I am here to experience the Staticman comment system. Yea, this feels really good.
Trying out some bullets:
Here’s an
inline codeand here’s a code block:Great!
Helpful Article. Thanks for writing and sharing!
Thanks for sharing!
How do you exactly “Integrate Comments Into Site” ? I’m very new to this thing and just trying out new stuff. I’m trying to make a simple website where people can share their thoughts anonymously, can anyone help me?
okay I already create a form but when I submit the message I get an 405 error and it doesn’t push anything to my git repo. This is my repo https://github.com/Augussst/your-thoughts
Hi, augussst.
I’m not really able to diagnose staticman or HTML issues here. If you think your problem is with the staticman server, I’d recommend taking a look on their github repo.
If you think instead the problem is more likely to be with the HTML or javascript necessary to integrate the form, try StackOverflow.
Good luck!
Nice article
Awesome post
Heading
Body text! More!
Great
test bold
Great article, thanks
Thank you
Super helpful, thanks! I’ve used this to add comments on a couple sites of mine.
But I’m having an issue with one thing! I’m trying to add a new field to the form (It’s a question field, and if they get the question wrong then the form errors). I’m able to do this if I add it as name=”question” and then validate it via js. But if I add it as name=”fields[question]” and add “question” to the allowedFields, I get an error “INVALID_FIELDS”. Is there a step I’m missing for adding in new fields?
Confused and confused, Ryan
Hi Ryan,
Have you checked into GitHub your changes to add the field? Staticman reads the config from the committed state of the branch and repo you specify so when making changes like this you have to check in changes before staticman can see them.
This looks cool
Almost there but I’m hitting a nasty bug. Comments are saving just fine by following this tutorial, but will not load.
I’m saving them in site.data.comments.recipes.recipe-name and have tried a few different iterations of comments.html to load them, all unsuccessful.
I’m close, because it’s loading the raw comment on the page but not parsing it correctly.
Here’s the key file: https://github.com/datapolitical/contrast/blob/master/_includes/comments.html
And the relevant code:
{% if site.data.comments.recipes[urlfilename] %}
{% endif %}
I know there’s something amiss in how i’m iterating through the available comments, but I’m not familiar enough with Jekyll or ruby to know what’s missing.
Excellent article. Helped me integrate staticman on my blog
Nice work!
test
Thanks for the post.
I hope that you guy’s might be interested to hear my following thoughts (I’m super lazy and this commenting architecture appears too complex for my liking :peace:)
Do we need to use liquid for the comments ? We could just integrate them in every post (would appear simpler and little bit faster) - instead of having a separate comments folder.
Do we actually need an online deployed service (staticman) and a complex api to receive them ?
We could just receive them via email through any free form processing tool from sth like formspree to even a wordpress/google sites/wix/etc form. (Aggregate a couple and) Imap receive via JS (lazy) when and as often we feel like, add them to the blog - by authoring a commit (automated or not).
The staticman’s md5 nowadays seems like a joke. We could publicly store an encrypted version of the email address via gpg (encrypt by public key). This could be done before saving and committing a new comment to the repository. Now we can contact the author of each comment if we feel like it. With the hashes we lose the contact functionality
Hi, congrats on the success of this beautiful integration. I am relatively ‘new’ to static websites and jekyll, including integrating with APIs.
I currently have Staticman running as a local server via localhost or 0.0.0.0 I have setup a simple HTML form to post to http://localhost.
The question I have is: how will I know the localhost POST and GET are working? I want to have the localhost development working before submission to public domain.
I have kept eye out on the terminal for any changes after submitting the form. Maybe, I need to understand the flowchart more on how each piece speaks to one another for both local and remote hosting.
Thank you for such a thorough tutorial. It works! The only problem is I do not get the message of a successful comment submission. It shows a message “Sending…” and disappears. However, it works fine on a test website. Probably, there is some js conflict. I am still figuring it out… I also wonder if someone tried to use
staticman-netlify-functionon Netlify, instead of Heroku?That’s strange: I tried it just now and it works for me. Are you saying it doesn’t work for here on my blog, or on your own blog?
If the latter, check the comments below for a message form Qi where is a note about a conflict with bootstrap which caused a similar problem and how they fixed it.
“Copy the …
assets/main.js… “ - rather: copyassets/main.jsand replace link inshowModal('Comment submitted', 'Thanks! Your comment is pending...Thanks Andrzej, I had miss that one and added a step to replace the link below the copy step.
Nice
Thanks Travis, this post is very informative! I spent about 10 hours on making everything work and this post helped most. I did not find a single place, other than your post, that explained I need an RSA key to self host staticman, not even in the official document. :-(
Except that
And reCaptca is annoying since I run uMatrix.
is this working
just to see how it looks :)
nice blog
Just testing.
This is a test comment . System looks nice!
Thanks Travis! Beautifully straightforward and thorough tutorial. I’ve been throwing together a blog as a side project (https://shwestrick.github.io/), and your instructions here were perfect; everything seemed to just work.
Also, your other posts look really interesting! I’ll enjoy reading through them this weekend.
Now I have some styling work to do—it seems like the .scss files might not be getting loaded correctly because my “Add Comment” form looks like shite. Perhaps the version of minima theme I’m using is different. Oh well, that will be a little puzzle for another day.
Hi Sam,
Thanks for the kind comment! Your blog looks up my alley (admittedly based on the sample size of 1 entry), and I’m definitely adding it to my list of blogs to check for new articles.
About the shite appearance, I’m not sure. It looks OK now, maybe you fixed it? You need to ensure the styles are actually included, e.g., by including main.js (or whatever the name of the file with your comment styles is: you can organize it in a few different ways) somehow in your html.
Now as design, html and CSS are not my strong suit, I’d personally argue even my comments look like more or less shite even when the styles are added correctly. It would be nice if each comment was visually distinguished a bit, maybe with a subtle background color, but I’ve never really modified it since I set it up (minus fixing a few bugs).
Actually I think I’m going to make a change right now so that the “comments” field has the full width, by default as it’s annoying to expand it every time I want to write a longer comment.
Yes I figured it out! It was a really silly issue: my
assets/main.scsswas missing the Jekyll “top matter” thing:So, I think it was getting ignored by Jekyll entirely. I’m not 100% sure yet how Jekyll works, but I’m slowly getting the hang of it.
I was also thinking it might be nice to modify the comments style a little. I’ll enjoy seeing what you come up with. And I’ll let you know if I make any changes myself!
Ah right.
So when your site gets generated, I think Jekyll has three high level behaviors for files appearing in the source repository:
_sitesub-directory), like stuff inassetssay png files._sassfoo.mdfile and Jekyll processes it and creates afoo.htmlwith the markdown transformed to html, the post template applied, etc. Processing is triggered when the file has front matter (the--------stuff).Processing includes transforming scss to css and copying it to
_site/assetsSo stuff in the_sassdirectory likemain.scsswon’t get into your site at all without front-matter.That’s how I understand it, at least!
Thanks for the tutorial. I will try to embed it on my own website!
Hi, following your guide I set up the heroku instance successfully. But now I am clueless about inegrating this to the actual site. Should I use the _includes folder from your test-blog and copy everything over?
Right, so this is kind of the least standard part of the integration, because unlike the API bridge, the data format, the integration with GitHub and so on, how you want to do this depends a lot on how you generate your blog, and how you want the comments section to look, etc.
Still, I tried to cover the case of integrating it with a typical Jekyll blog. This is the integration I used: you have to copy the supporting files to your repository, and the modify some part of your post template or foot or whatever to include the comments.
Is there any particular part you are stuck on? Note that I’m neither an HTML, CSS or JavaScript expert (which probably shows in the relatively vanilla appearance of the integration).
hi, i tried every step of this tutorial but the heroku instance returns me a application error with the logs showing error code H10.
No idea about the Heroku error H10, sorry. Google turned up a few leads though…
I also suffered from this - what worked for me was copying the RSA private key manually(!) from the file on my computer to the config vars in the Heroku settings dashboard (make sure you copy everything inline, so there are no spaces/enters).
For example: —–BEGIN RSA PRIVATE KEY—–ABCDEFGHIJK………XYZ—–END RSA PRIVATE KEY—–
Great Article!
Is staticman stil working?
Yes, it is. In principle, this approach does not depend on “staticman” to keep working, because you are hosting your own service. There is no 3rd party shared service involved. So you would really ask “is my staticman instance hosted at XYZ” still running, or something like that.
Testing this.
Does it work?
Yes, it works!
testing comments
eweiowe
Testing comments 123
this is awesome. I am gonna give it a try!
greatttt
test
testing
Hey does this still work? (test comment) Btw, nice job, this is really cool and helpful. Cheers!
Thank you for your post!
just checking comments
Very useful article. Thanks for the writeup
This is a test comment. Thanks for the article :)
Hey dude, thanks a bunch for this tutorial. I’ve been wanting to do this for a while and very much wanted to avoid the problems of unsustainability should something happen to the “main staticman” implementation
test for email responsiveness
Great post and tutorial on getting Staticman up and running via Heroku. Took some time, but I was able to get comments up and running on one of my Jekyll sites hosted on Netlify.
The only place I had a problem was getting Heroku to accept my RSA Private Key via the command line. I’m a Heroku noob and, because the suntax in your post was different for the variable on the RSA key than for the
${braidge_app_name}and${github_token}, it took me quite awhile to figure out I needed to runcat ~/.ssh/staticman_key | tr -d '\n'in my command line and use the output in the Heroku command.Everything else was pretty much a breeze. Thanks again for a super post!
Testttt
test
test
Thanks Travis, I really LOVE your tutorial. I am able to set up comment section on my own site following your instructions.
But I also face the same issue that when clicking “submit” the message, about “pending” shows up as it should, but the webpage goes “greyed out” and the message about the comment being pending is not clickable. I just want to check what is the behavior on your site.
Must be related to the css classes that the javascript applies. Make sure you have all the classes referred to in this section of code.
Hi Travis, I really appreciate your help. The problem is related the Bootstrap modal. When the modal container has a fixed or relative position or is within an element with a fixed or relative position, the modal window appears underneath the grey fade and is noneditable. I fixed this problem by replacing the showModal function call with Sweetalert2. Thanks again for your awesome post!
I tried to added Staticman on my blog and its not working “https://twnbot.herokuapp.com/v3/entry/github/thewhatnote/thewhatnote.github.io”
If possible please check my repository and advise.
I have changed it to v2, and it worked. but comments are not displaying under posts.
Sorry, I can’t help you debug it.
In general, staticman is a “batteries not included” solution that will probably, at some point require some basic debugging on your part. Familiarity with html and javascript (including node.js) is a plus. If you run into a specific, reproducible issue you could consider filing an issue on the staticman repo, although as a free project you can expect that the current maintainers may not always have the time or energy to look into specific issues.
test
Hi! Big thanks for the guide!
I have implemented it to a website and it seems to work. I have a couple of questions though.
When clicking “submit” the message about “pending” shows up as it should, but the webpage goes “greyed out” and the message about the comment being pending is not clickable.
I removed your `` in that message from
main.js, thought that could be the problem but that did not help.Any ideas?
Also, I have almost none experience with HTML/CSS and my page uses some kind of dynamic font size. Could that be applied to ‘_sass/comment-styles.css` somehow?
My main.scss:
Sorry, I can’t really help you debug this issue much.
It may be a problem with your styles. You can see that it works in my case. You could try to triangulate what’s different between my setup and yours, or reduce the example to the bare minimum and add stuff back in until it stops working.
I wrote this post about staticman because it was harder than I thought and it might help others, but I can’t really help you debug your individual issues.
Testing
Awesome job. I faced some issues with comments not showing but fixed it when i removed symbols from post names. All working now!
Thanks for the note!
Thanks a lot for this well made detailed guide. I do have a couple of questions tho!
Everything is working properly except that, my comments aren’t showing at all. I tried moderation on and off, i can see the PRs, i merged the PRs, but nothing is showing on my blog. Do you have any idea ?
When i submit a comment, the ‘Pending’ message is always shown with or without moderation enabled. Also, when i click on the link it takes me to your own site. Where can i change that?
Fixed! However, i’m facing another issue:
On my site i can now see comments, but when i reply to a comment using the button and filling everything, it gives me a INVALID_FILEDS error. Any idea why would this happen?
I added the bot account (in the heroku app i created) as collaborator, yet it is still showing Invitation not found
have been stuck at that step since yesterday, tried a lot of things but i just can’t find the issue. Please help.
Did you accept the bot invite by email? If you did that (it’s probably easiest way), you don’t need to do the invite link in the API: it’s one or the other. As soon as the invite has been accepted by any method, the API will return the “Invitation not found” message.
If you have further issues, try to make it reproducible so you can file an issue on the staticman repo, where you’ll probably get better help.
Want to see what happens after i press submit
Your comment gets moderated (the link to the PR is in the submission notice) and when I accept it, it shows up like this!
I’m unclear on the proper webhook address when I deploy Staticman at Heroku.
For the public instance the webhook was https://api.staticman.net/v1/webhook
For my instance I’m guessing https://spinningnumbers-staticmandev2.herokuapp.com/v1/webhook/, but I’m getting a 404 not found error.
While moving to Heroku I deleted the public staticman collaborator and only have my robot as a collaborator.
2020-04-18T22:56:56.155851+00:00 heroku[router]: at=info method=POST path=”/v1/webhook/” host=spinningnumbers-staticmandev2.herokuapp.com request_id=a8552a56-4182-415d-ba95-5cae432a7f07 fwd=”140.82.115.241” dyno=web.1 connect=0ms service=6ms status=404 bytes=505 protocol=https
I never set up a webhook due to laziness and I just click “delete branch” every time I accept a reply (not actually sure which is lazier, obviously the webhook will pay off if I get a lot of replies, but so far that’s not the case).
So I don’t know anything about the webhook. However, maybe your problem is the trailing slash: try with
v1/webhooknotv1/webhook/Travis - You guessed right. I changed
v1/webhook/tov1/webhookand the not-found problem cleared up. I started getting notification emails from MailGun. This mailhook provides two services: It deletes unneeded branches and it launches a notification email to people who have subscribed. This second feature isn’t mentioned in the Staticman documentation for webhooks.Glad to hear it worked out!
Hey! Do you know of any alternative for mailgun issue ? It’s not free anymore and the sandbox domain doesn’t work.
Hi! Just wanted to say thanks so much for writing this guide, I would never have been able to get staticman configured and working without it. Have a fantastic day.
Hey Travis! First off, I’d like to give a big thanks for making this blog and helping everyone setup staticman. I got everything working, but for some reason, the CSS for the comment submission isn’t appearing. I was wondering if there’s something wrong with the guide, or if I just set something up wrong. Thanks! :D
My website repo: https://github.com/KauntaOfficial/kauntaofficial.github.io
When you say “the CSS for the comment submission isn’t appearing”, do you mean stuff is not being styled as expected?
The things to do would be to view source/dev tools on your page, and check that the classes are applied to the elements as you expect, the stylesheets are included as you expect and contain your styles, etc. The Firefox style browser or whatever the thing in chrome is called make this relatively easy.
I’m just testing
Travis thanks for the detailed explanation. Have done the work-at-night-until-late-with-a-glass-of-wine thing so not surprised my installation (here: http://donkeyontheedge.com) isn’t working yet;-) Will get stuck in tomorrow afternoon after work should hopefully crack it.
Hi Travis, Dug replying to Dug here. Just to say I’m going to go through the installation again line by line double-checking against your instructions. One thing that would be useful is a debbuging method. Current status is I’m getting the “missing block” config file error, which I think you listed as a Staticman issue? I’ll get stuck in a bit later but all pointers welcome:-)
…also just noticed that carriage return in a comment message field upsets the key/vale pair layout in the generated pull request (I think)
Hi Dug,
So that “missing block” error shows up for a lot of different problems due to bugs in the staticman error handling. You can get more detailed info using a fixed branch rather than staticman/master, but I’ll respond more on issue 345 which I think you opened on this.
Yes, any newlines in the comment reply breaks the formatting in the pull request. I’m pretty sure the staticman project would happily accept a PR to fix that! I think it’s just a matter of escaping (markdown style) the newlines when generating the text for the PR.
Thanks for this blog, I find it very informative. Micro-optimizing (alone or within friendly competition - to the extent possible) is really interesting to me, but I’m still lacking a lot of knowledge (and ideas for things to optimize). I was wondering if there’s anywhere to chat about this kind of stuff (e.g. Discord)? Thanks!
Hello,
Thanks for this guide, as the main site of staticman is out of date, sadly even by following your instructions, I can’t make it work for my blog. My bridge application on herokuapp.com always returns me errors, so I can’t generate the encrypted secret key for recaptcha,…
I hope that you can tell me why this is not working for me.
No, I can’t tell you why it’s not working without any details.
Your best approach is to file a bug against staticman after checking that your error isn’t also mentioned/solved in an existing issue.
Include full details of your error message, how you generated your keys, whether it works if you disable reCAPTCHA, etc.
Finally note that a while ago I changed the
ssh-keygencommand to include-m PEMwhich is necessary to get the right key format in newer versions of openssl. If you used the command without that, you can try regenerating your keys.Thank you a lot Travis, my issue was the wrong generation of the ssh key. With the new command line it works directly.
Now I just need to integrate it in a post as my configuration should be good.
I really appreciate the help you gave me.
I have an issue with the display of comments, I tried to post a comment and I have it on in the _data/comments/{$my_post_file_name}/ folder but it doesn’t appear. It seems that the test site.data.comments[page.slug] in comments.html failed. May I miss something in the configuration file or maybe because I have the ‘+’ character in the filename of the blog post?
Thank you.
I finally understood why ‘+’ character in the file names cause an issue with jekyll, the page.slug have to be put between double quotes, which breaks which can lead in some errors in code.
Thank you again, I am super happy to leave Wordpress
Thanks for your comment.
Can you clarify if/how you resolved the problem? Did you add double quotes? Was the problem with the + character?
Yes the issue was the + characters in the post filename, I replaced C++ by Cpp to make it works. It was hard to understand the issue as I have almost 0 knowledge in web technologies and particularly in jekyll. It seems that jekyll add “ in some circumstances around string when interpreting it and sometimes it doesn’t. So my page.slug variable did not contained the “ instead of the corresponding key of the site.data.comments table. You can find my new blog at https://flamaros.github.io/.
In the comment form and comment list, instead of just using page.slug, you should slugify it, for me slugify: “ascii” is safe enough. The reason is that comments are stored in a directory named after the “slug” you pass to Staticman in the comment form, I suppose it is page.slug, if that slug contains special characters then these characters will be altered and/or discarded by Jekyll when it reads that directory name. Then when you use page.slug again in the comment list, Jekyll doesn’t find any comment for that slug, thus no comment is displayed
Thanks man! Got it working finally after months, i wasted so much time trying with the v3 GitHub app, so at the end went for the old v2 method described here.
Thanks!
Note that almost everything about v2 and v3 are the same. v3 basically just extends the URL format to not assume github: it now supports gitlab as well, so either github or gitlab needs to be in the URL. You can follow this guide and use the v3 scheme just fine, others have done it.
So just to clarify that the problems you had were probably not related to v3 vs v2, but some other aspect of using the shared github bot, and that “v2” isn’t really old: it has the same functionality as v3, minus gitlab support.
Thanks again for the clarification. I am aware that v3 just extends the URL formats and have tried those scenarios. The problem was just i got errors and timeouts, and i totally forget to open the issue with a stacktrace XD. I think it was just some sort of incompatibility with that version of Node.
Anyway i’m very happy with the setup, i was just stubborn for that v3/bot install… you know… rocket science :-)
First of all, thanks for the very details post! I want to mention my experience which went against footnote 8: I initially accepted the invitation from the bot account via the Github linked but kept invitation not found when trying to connect it. Then i came across https://www.flyinggrizzly.io/2017/12/setting-up-staticman-server/ which says I should not accept it so after I tried removed the bot as a collaborator and tried to connect again it worked
Once again thanks
Actually, I think that’s consistent with footnote 8, but perhaps there is some confusion. Assuming that by “via the Github linked” you mean that you accepted the invitation sent to your email, then I think your experience is as expected.
That is, you only need to accept the email invite or do the
v2/connectthing because they serve the same purpose: to accept the invitation for the bot to become a collaborator to the repository. If you accepted the invite via email, you don’t need to go to theconnectURL: and if you do, you’ll get the “not found” error since there is no waiting connection.i wanna test a msg ^_^
Stumbled upon staticman and was superexcited! Then learned staticmanapp can’t be added… Started to read through staticman issues… Got stuck not understanding outdated tutorials… Went through staticman issues by going backwards and stumbled upon your page. Before I start the steps in this tutorial I first wanna check if it works :P
I followed most of your steps - haven’t set up recaptcha yet - and staticman is now running on Heroku and successfully forwarding comments as pull requests. Thank you Travis Downs.
I just wanna test this
Thanks so much for documenting this information! I was able to implement Staticman comments on my website following your guidance. Some things have changed with v3 of Staticman, but I got there in the end.
Jason www.jasonhallen.com
Testing a kramdown comment with a link, a footnote1,
some code.A heading
Some javacscript:
footnote text ↩
Test reply 42
Right on tdowns will give this a go myself. Appreciate you documenting this for others.
I appreciate the detail here, much more information than I expected from the title. Good to know there’s a system for comments on a static site.
reCAPTCHA often translates to a back-button-press for me. I’ve heard (but not tried) an easy anti-spam solution is to add hidden form fields and fail if they get filled out, which should stop most of the untargeted stuff.
Yes, I have a so-called hidden “honeypot” field as a second line of defense. Some people say you should even have the field visible for it to work best, and the theme I copied this from did that – but I just couldn’t stomach making it visible and telling people not to fill it out.
Nice detour post explaining how to make this work!
Yes, for some definition of “work” :).